This is a tutorial for scanning and modifying images in Adobe
Photoshop 3.0. When entering the .information provided here is
equally applicable for use with Adobe Photoshop 2.0, since both
versions share many common features. This tutorial is by no means
a manual for scanning and editing images in Adobe Photoshop. Rather,
it is quick reference of tips and pointers that future classes
may find useful in creating and posting images on the World Wide
Web.
For more information, see the Adobe Photoshop Version 3.0 User
Guide located in the
Laboratory for Scientific Visualization.
The Laboratory for Scientific Visualization in Handcock Hall,
there are PC & Mac Computers that Have scanners hooked up
to them, (two PC computers). For this project a PC computer was
used because all of the peers of the group working on the project
owned PC computers. (Lab assistants can help you locate the appropriate
computers.) Before you open Adobe Photoshop you should make sure
the scanner is on and ready to scan. Once the scanner is ready
(usually is indicated by a green ready light). To open Adobe Photoshop
on Windows 95' click on:
This program has many capabilities, for this reason the first
setting you must check is the TWAIN_32 Source. This is done by
clicking on:
and make sure it is set to Microteck Scan Wizard (32 bit). Once
Adobe Photoshop has loaded you may either edit an already existing
image or you may scan in a new image. To edit an existing image,
choose:
and open your image from the appropriate disk/directories. To
scan in a new image go to:
submenu and choose the appropriate plug-in module for the scanner
you will be using. In our case, we chose the TWAIN_32 option.
While the program is loading, load your image on the scanner and
close the lid. Make sure the image is aligned straight, (if using
a book, you may want to place another book on top of it to ensure
the image is flat on the scanner). Looking back at the monitor
there are three windows. The first:

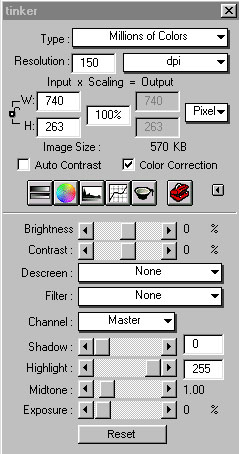
should be set to automatic. This box will control the initial
color, contrast, size, and resolution of your image. All of these
things can be modified latter. The second box is a window for
your image.
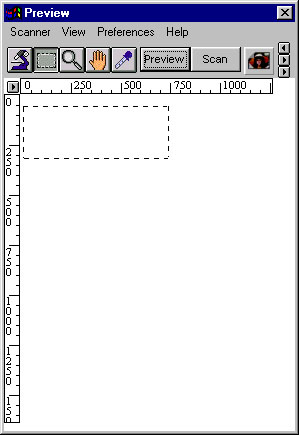
By clicking on the preview button it will do an initial scan of
your image. The third box is your tools box.
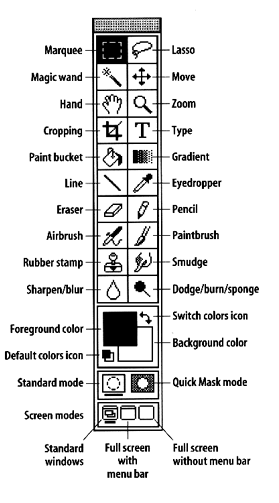
Click for more information on the tools
The move cursor will already be in the image window as a dashed
lined box with your picture. With you mouse you may position
the box appropriately around the exact image you want. Once the
box is where you want it click on the scan button and it will
scan that image that is in the cursor box only. (Scanning may
take a we minutes.) A window will pop up with your image. You
may scan as many images at a time as you wish, (we recommend that
you only do few at a time so you can save your work as you go).
You may not edit your image while the preview window is open.
At this time close the preview box by clicking on the X in the
upper right hand corner of the preview box.
Once a new image has been scanned or a previously saved image
has been opened, Adobe Photoshop may be used to edit the image.
We recommend scanning images at a resolution of 144 pixels per
inch. If your image is in color or is unusually large, you may
wish to select a ower resolution to keep the file size reasonable.
Remember: it is usually better to scan the image in at a higher
resolution than what the final image resolution will be (see Resolution
Basics) Link.
Image resolution refers to the spacing of pixels within the image
and is measured in pixels per inch (ppi). The higher the resolution,
the more pixels in the image. Higher resolutions allow for more
detail and subtle color transitions in an image.
Image size describes the physical dimensions of an image. Because
the number of pixels in an image is fixed, increasing the size
of an image decreases its resolution, and decreasing its size
increases its resolution. For example, doubling the resolution
of an image from 72 to 144 ppi reduces it to one quarter of its
original size. Halving the resolution, for example, from 300 to
150 creates an image that is twice its original dimensions.
If you keep the image the same size, increasing the resolution
requires Adobe Photoshop to create new pixels that can make the
image appear blurry or out of focus. Because of this, increasing
the resolution often produces a poorer quality image than the
original.
These are tools we found particularly helpful:
Under Image > Adjust > Rotate:
The Rotate command allowed us to align the images horizontally.
The Rotate command can also rotate selections, such as text, for
aligning with vertical axes.
Under Filter > Blur:
Blurring was usually the last operation we performed on an image.
Like anti-aliasing in text, blurring helps smooth out rough edges
created a more aesthetically pleasing image.
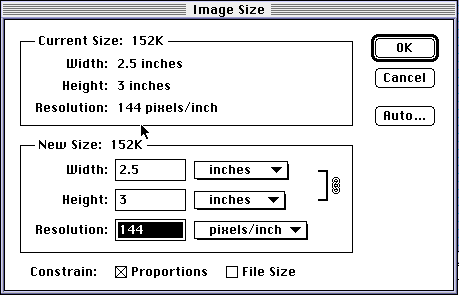
Under Image > Image size:
In the image size box you can control the amount of spaced that
the image took up on a disk by adjusting the width, (the height
adjust automatically), and the resolution, you can see the size.
Under Image:
there are submenu for Bright/ Contrast, Color/ Balance, and Hue/
Saturation. All of these techniques are self explanatory once
opened.
Submitted by Michelle Gallagher
Virginia Tech Materials Science and Engineering
http://www.eng.vt.edu/eng/materials/classes/MSE2094_NoteBook/97ClassProj/visual/scanning.html
Last updated: 5/7/97